Once an incident has been entered into the system, it will follow the automatic routing rules that your organization has established. It may go through several users for approval before being assigned to the user who will actually perform the work. In many cases, the last step in the automatic routing will go to an Administrator or Supervisor and that user will manually assign the incident to the technician.
How to Process Incidents
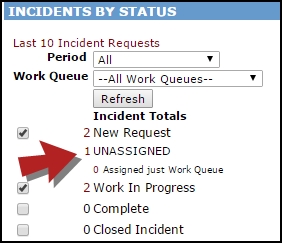
- In the Incidents By Status section of your Incident home page, you will see a list of Incident Totals.
- Click on the number next to Unassigned. These are the incidents that have been assigned to you for processing.
- This brings you to a processing screen where you will see information for the first incident in the list of Unassigned incidents.
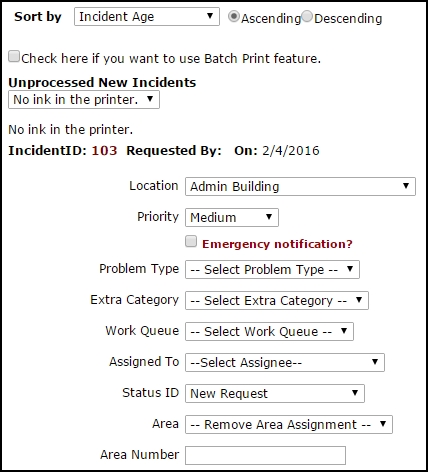
- You can resort the list of incidents, by using the Sort By drop down box.
- If you need to print hard copies of the incidents that you are processing, you can check the box to use the Batch Print feature.
- The Unprocessed New Requests drop down box shows you the Request Description for the incident on the screen. To process a different incident, select a different request description from this drop down box.
- You will see the Incident ID, Requester's name and date requested on the next line. To view the long form of the incident, click on the Incident ID number.
- The drop down boxes for each field show the information that was entered on the original request. If needed, you can make changes to any of this information.
- To assign this incident to a user, click on the Assigned To drop down box and select the user's name.
- You can change the Status of this request to Work in Progress (or any other status) by using the Status ID drop down box. If you do not change the status here, the system may prompt you to change it when you click submit.
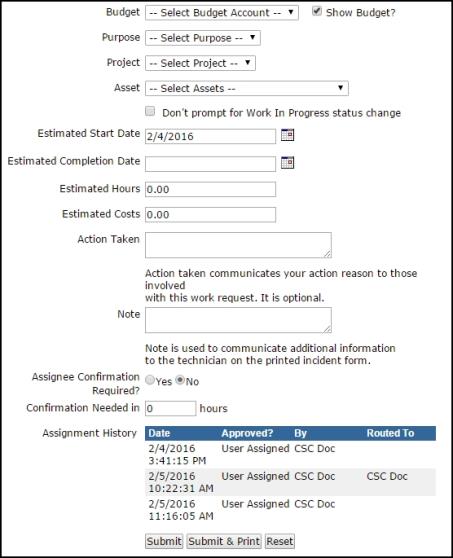
- If you need to enter a Budget, Purpose, Project, or an Asset select it from the drop down boxes.
- The Estimated Start Date will already be filled in for you.
- Fill in the other information as needed.
- At the bottom of the processing screen, click the Submit button to save your changes and send the incident to the assigned user. It will appear on their home page.
- If you need to print the incident, click Submit & Print.
Once you click Submit, the incident will no longer appear in your Unassigned Incidents. The screen will refresh to show the details of the next incident in the list for you to process.
